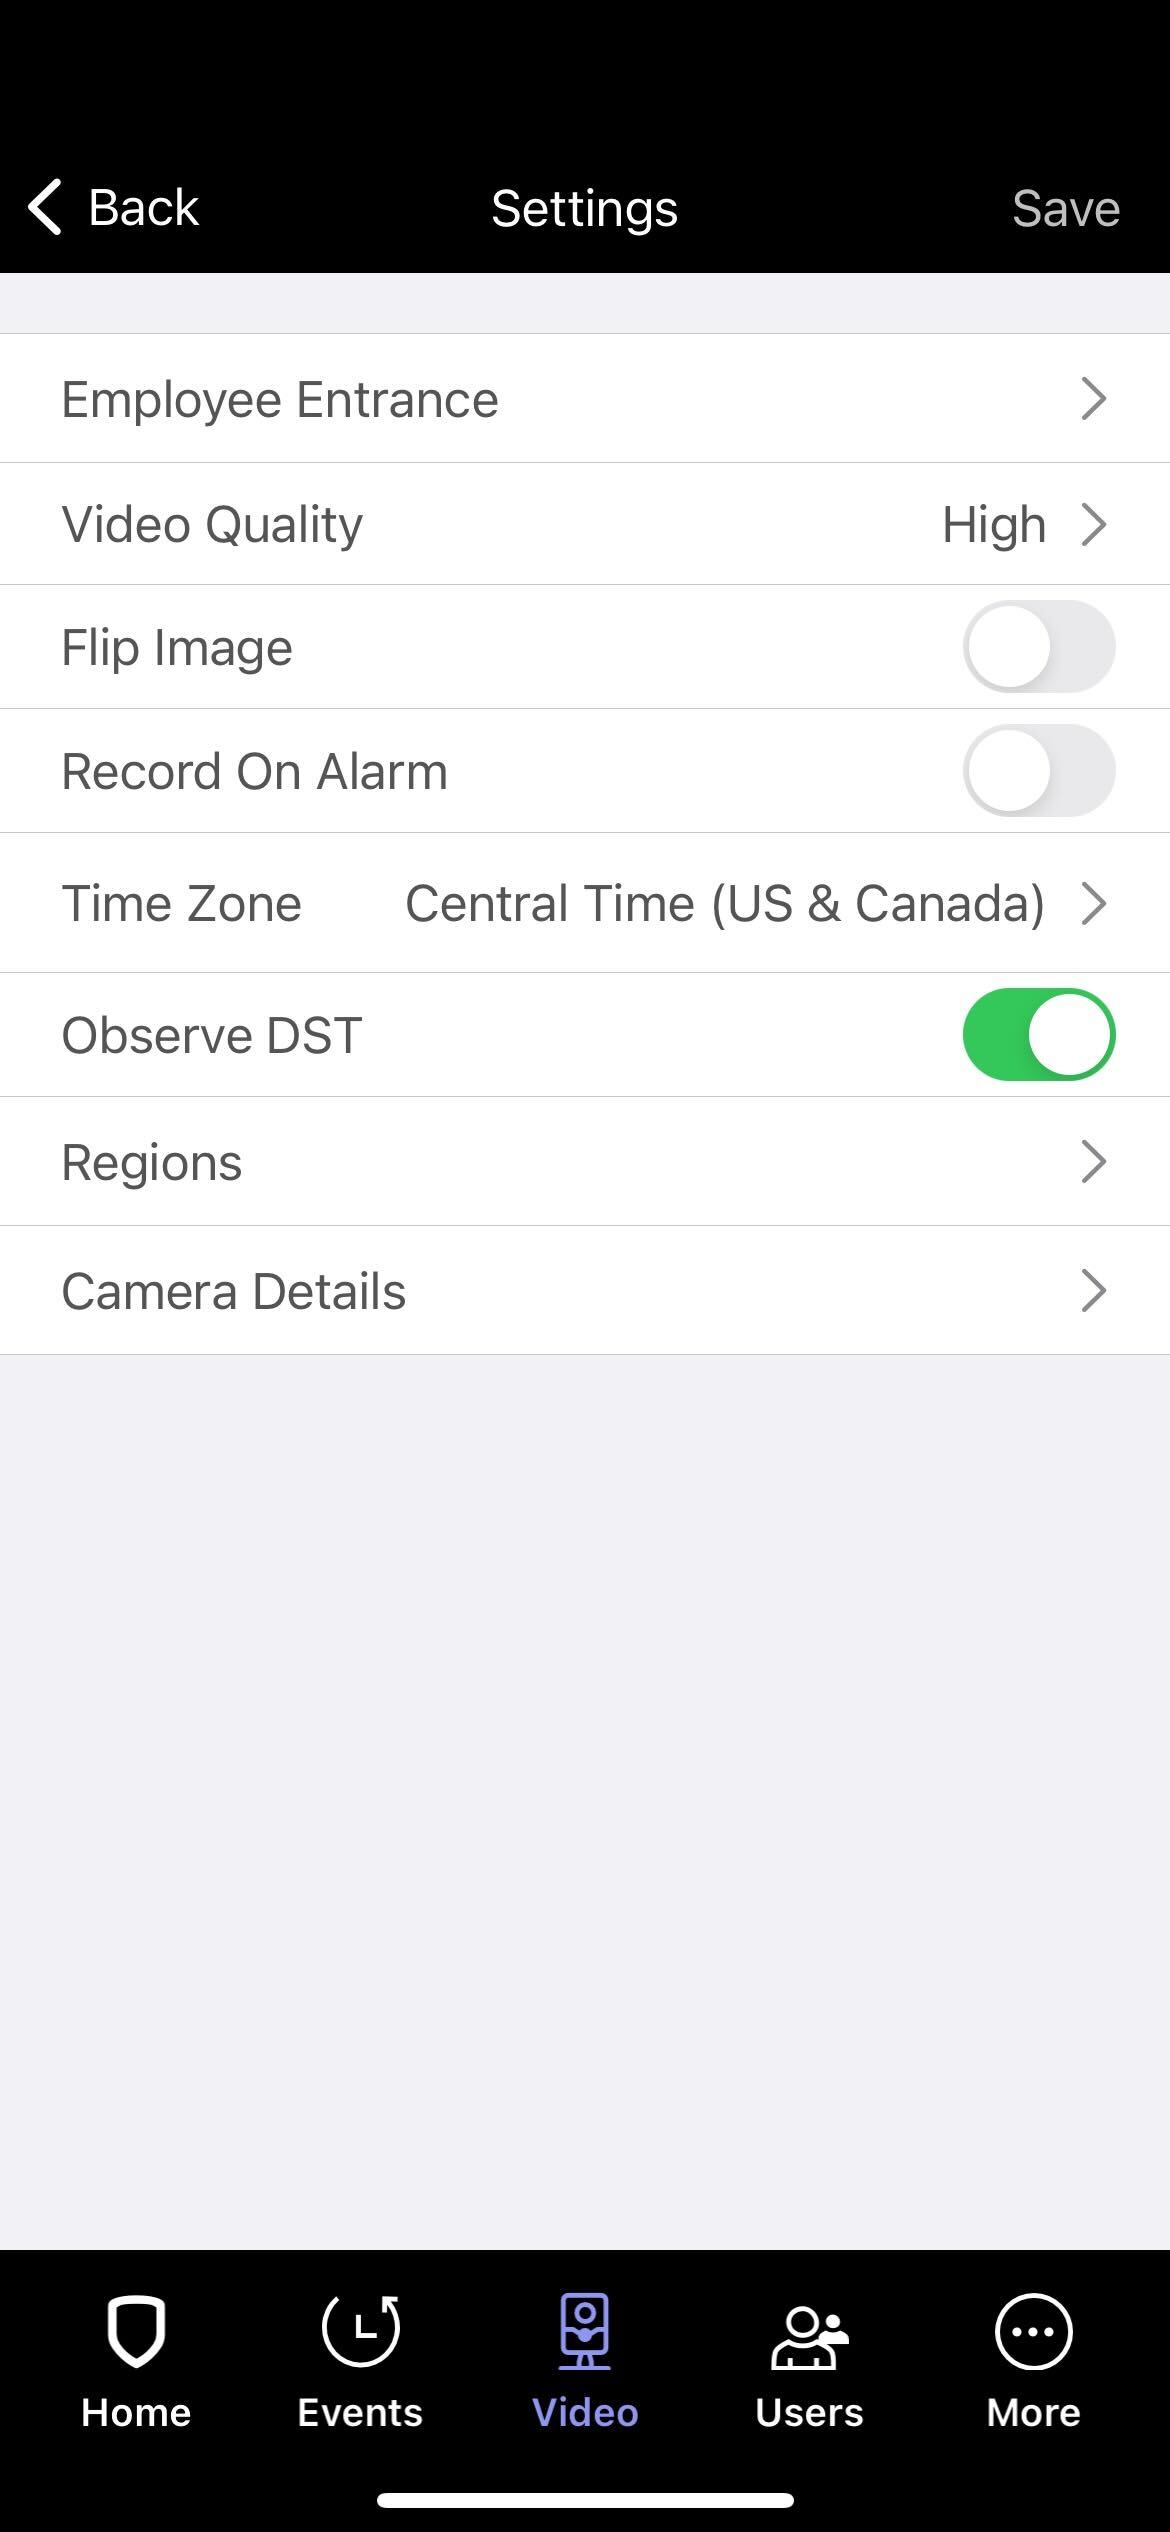
Edit Camera Settings
-
Select the camera you want to edit.
-
Select the Edit icon in the top left corner. If a camera doesn’t have the Edit icon, then its settings cannot be edited.
-
Make changes to camera settings as needed:
-
Camera Name: Select the camera’s name, then enter the new name.
-
Video Quality: Choose if you want the video quality to be Low, Medium, or High.
-
Flip Image: Turn this setting on to change the orientation of video from ceiling-mounted cameras.
-
Record on Alarm: Turn this setting on to start recording when the system goes into alarm. The camera will record starting 5 seconds before an alarm is initiated and 15 seconds after an alarm is initiated. Two additional 20 second clips are available for a total of 1 minute of footage.
-
Time Zone: Select the proper time zone from the drop-down menu.
-
Observe DST: Enable this setting to have the time observe daylight savings time.
-
Regions: Place, adjust, and delete up to four motion detection regions for a camera.
-
Camera Details: View the camera’s name, MAC address, serial number, last check-in, and wireless signal strength.
-
-
After you’re done making changes, select Save.
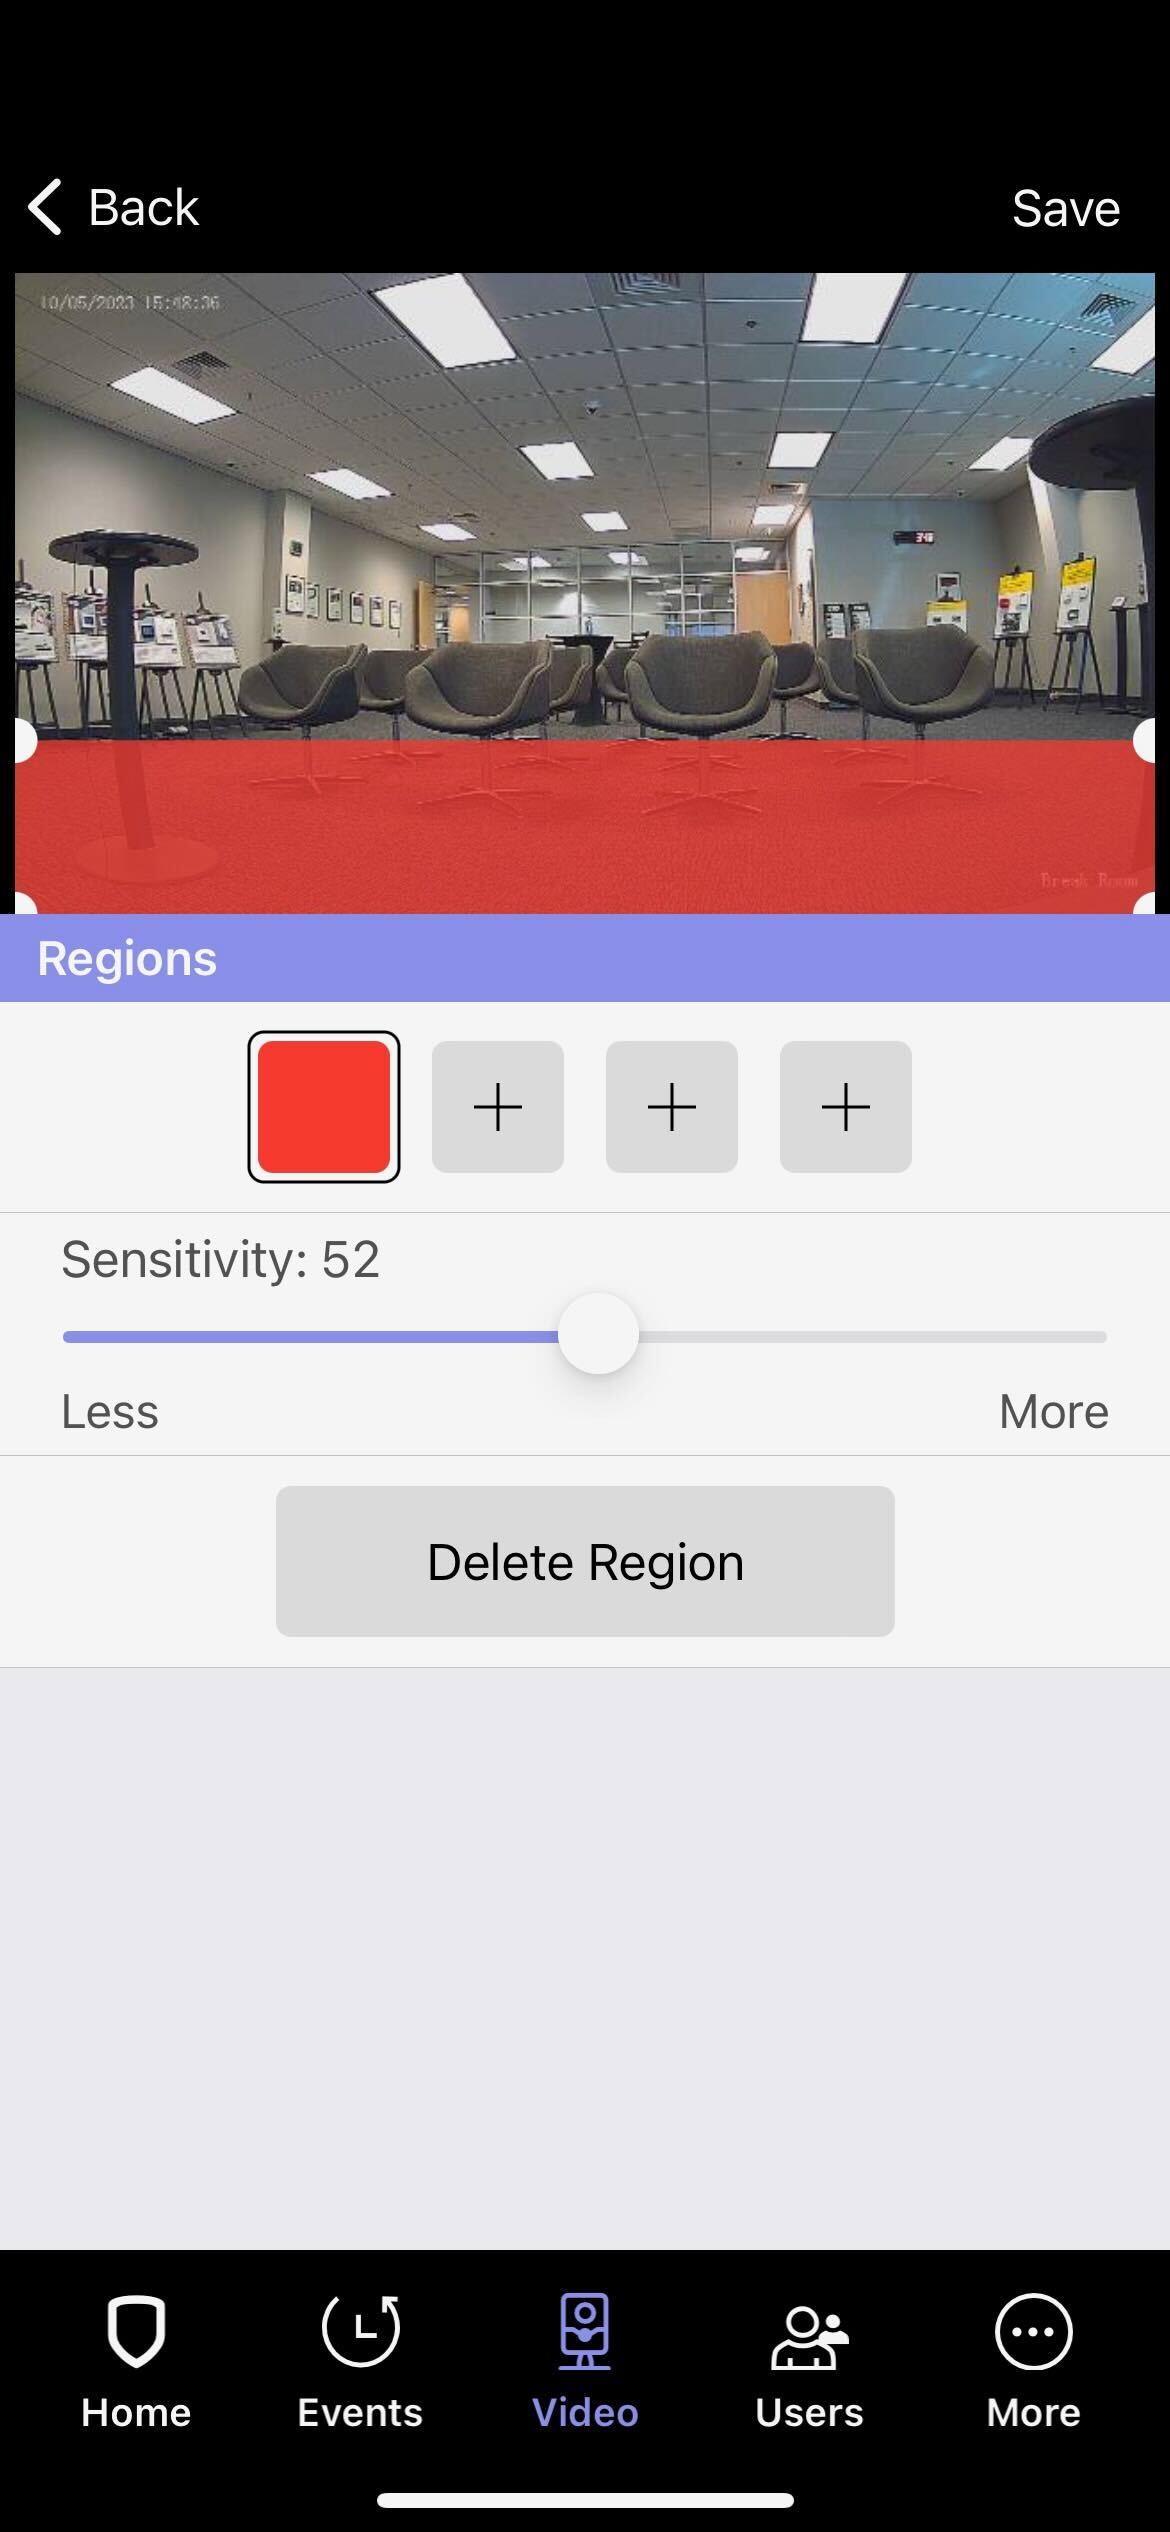
Configure Motion Detection Regions (All V-6000 Camera Models)
If your camera has Motion Detection Region settings, you can add up to four regions. Regions allow your camera to detect motion. If your camera does not have at least one region set up, it will not detect motion.
Regions are sections of an area where cameras detect motion. Motion that occurs outside a region is not detected. For example, a region covering the doorway to a room only detects motion in the doorway.
To configure a detection region, complete the following steps:
-
Navigate to Virtual Keypad and select the camera you want to add a motion detection region to.
-
In the camera live view, select the Settings icon in the top left corner.
-
Select Regions. A screen populates with the camera live view.
-
Press the + under the camera live view to add a region. A 4-point rectangle will populate in the camera view screen. Press and drag an endpoint to change the size of the region.
-
Select the sensitivity of the region. Default is 50.
-
Select Save at the top of the screen.
Configure Video Analytics (V-6012B, V-6014B, V-6042T, and V-6044T)
If your camera has Regions & Analytics settings, you can add up to four regions and four lines. Regions and lines allow your camera to detect motion. If your camera does not have at least one region or line set up, it will not detect motion. You can also add analytics to your camera.
Regions are sections of an area where cameras detect motion. Motion that occurs outside a region is not detected. For example, a region covering the doorway to a room will only detect motion in the doorway.
Lines are sections of a room where motion has to cross for the camera to detect motion. For example, a line at the doorway will detect motion if someone crosses the line at the doorway.
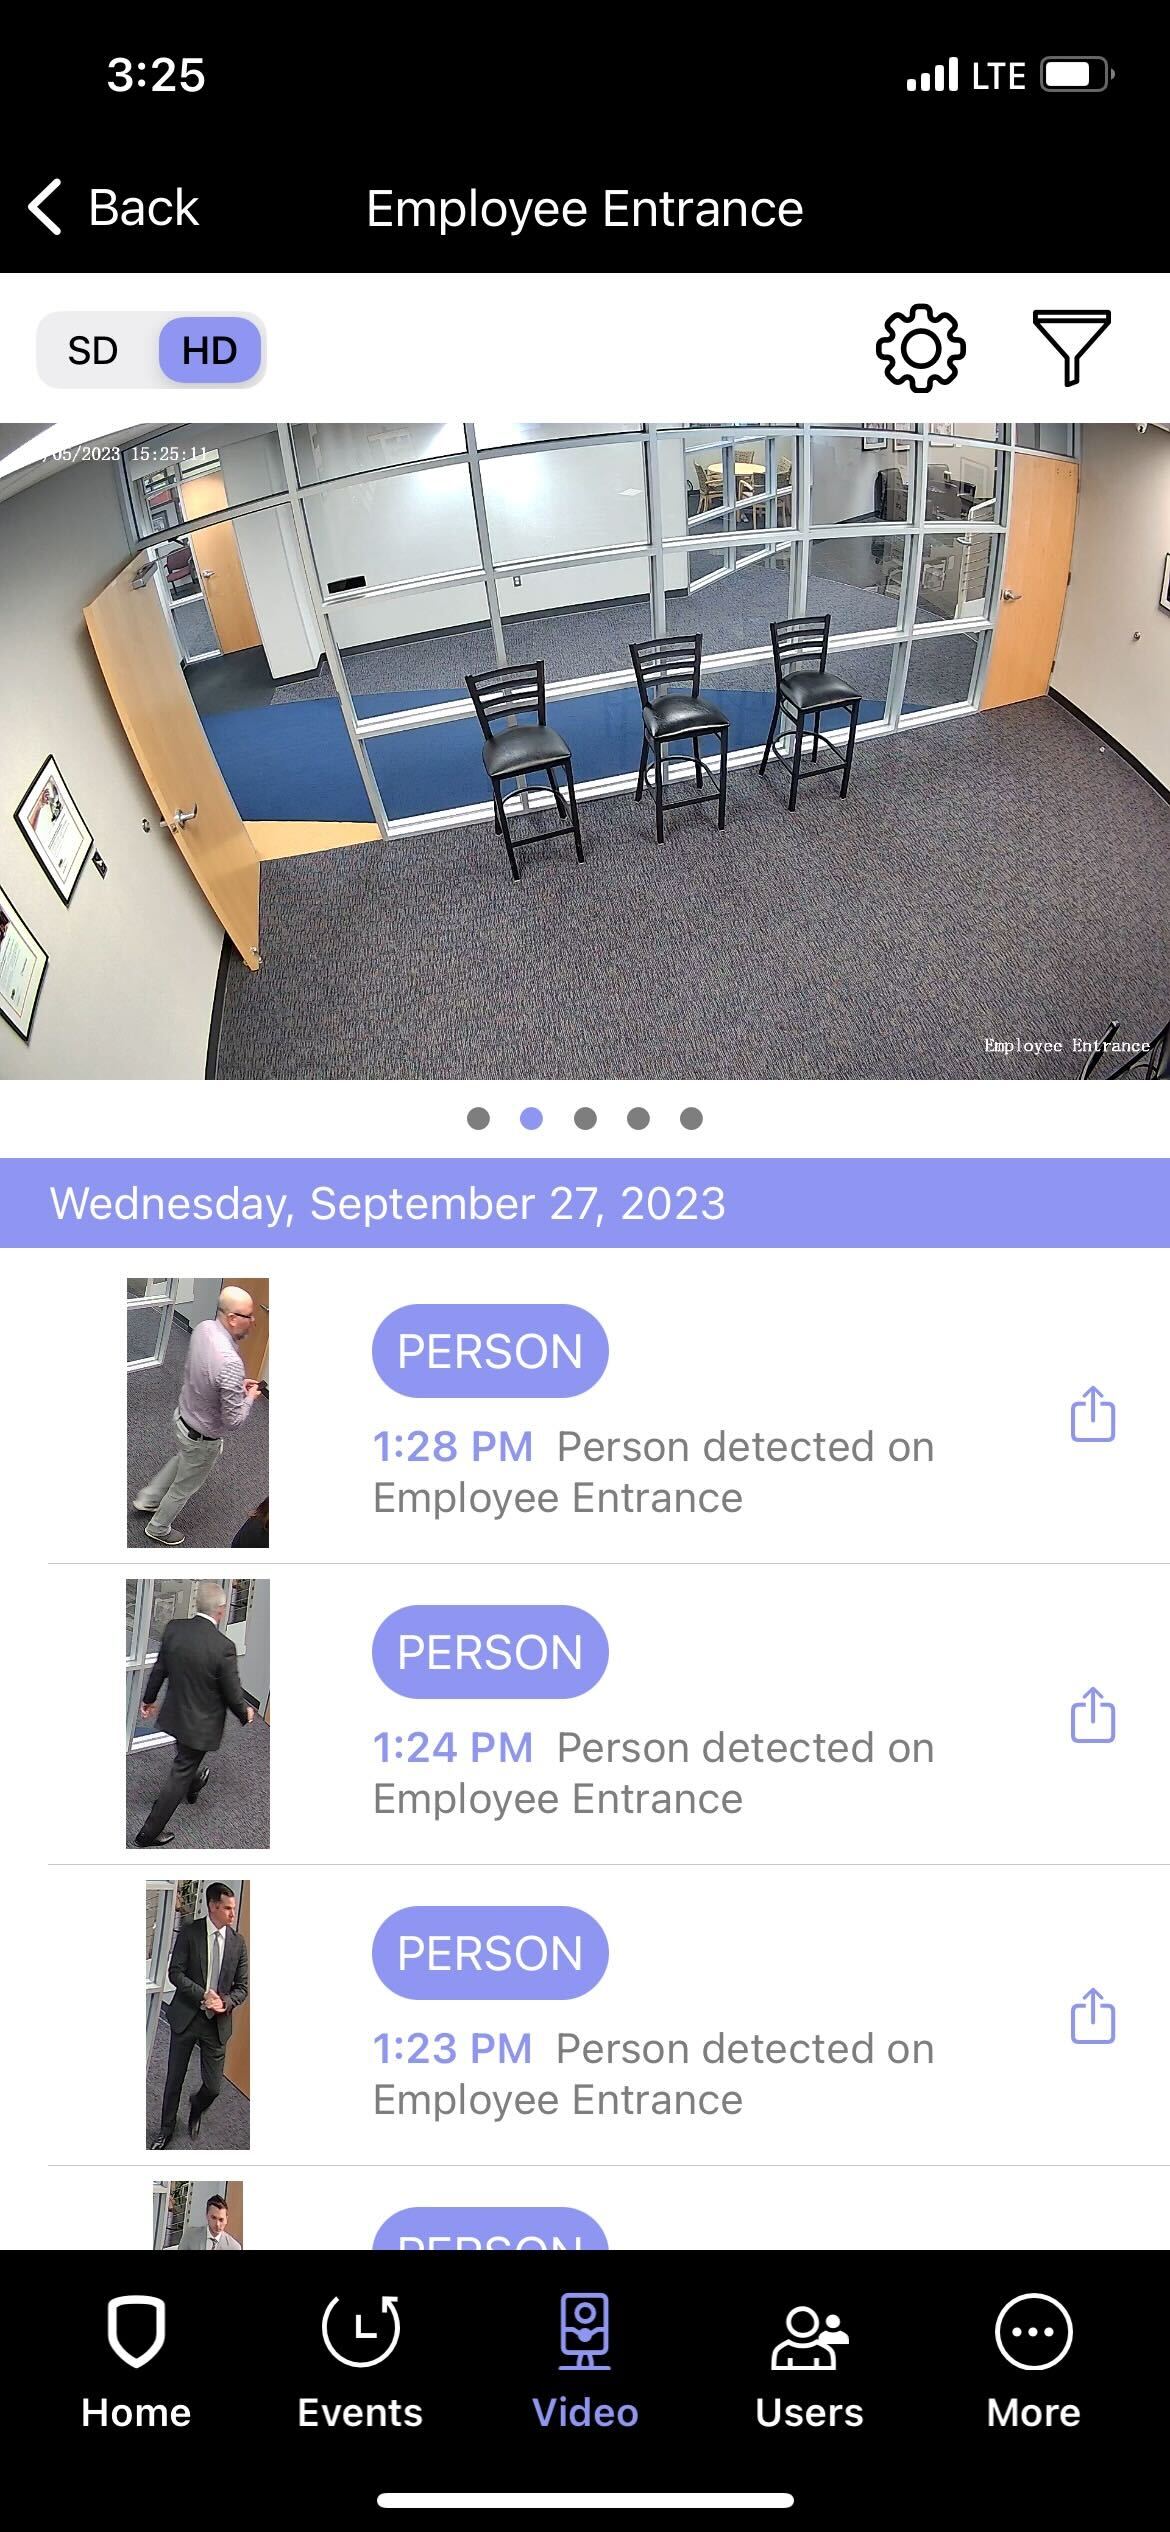
Analytics allow your camera to detect people and detect vehicles. When analytics are enabled, your camera records a 30-second clip on motion. The clip is stored in Events with information about what was detected, when, and where.
To configure analytics settings, complete the following steps:
-
Navigate to Virtual Keypad and select the camera you want to add video analytics to.
-
In the camera live view, select the Settings icon in the top left corner.
-
Select Regions. A screen will populate with the camera live view.
-
In the Regions section, press the + icon. A 4-point rectangle will populate in the camera view screen. Press and drag an endpoint to change the size of the region. Up to 6 endpoints can be created and manipulated to create a custom region.
-
Select the sensitivity of the region. Default is 50.
-
In the Line Cross section, press the + icon. Select + Line Cross. A 2-point line will populate in the camera view screen. Press and drag an endpoint to change the length of the line.
-
In the Direction section, choose whether the direction of the line cross will be an Entry, Exit, or both.
-
Use the toggles to select whether you want the region or line cross to detect People, Vehicles, or both.
-
Select Save at the top of the screen.